Creating a home that feels personal and unique doesn’t have to involve hiring an expensive interior designer or buying the latest trendy decor. With some creativity and a few DIY skills, you can transform your space into a reflection of your personality. In this article, I’ll explore various DIY home decor projects that are not only budget-friendly but also fun and rewarding. From upcycling old furniture to creating your artwork, these projects will help you personalize your home and make it truly yours.
Table of Contents
The Joy of DIY Home Decor
Why DIY Home Decor?
There’s something deeply satisfying about creating something with your own hands. When it comes to home decor, DIY projects allow you to customize your living space exactly how you want it. You get to choose the colors, materials, and styles that reflect your taste. Plus, DIY decor can be more affordable than buying new items, and it often results in one-of-a-kind pieces.
Benefits of Personalizing Your Space
Personalizing your space has several benefits. It can make your home feel more comfortable and inviting, improve your mood, and even boost your productivity. A well-decorated space that reflects your personality can also be a great conversation starter when you have guests over.
Getting Started with DIY Projects
Before diving into DIY projects, it’s essential to have a plan. Decide which areas of your home you’d like to focus on and what type of decor you’d like to create. Gather inspiration from magazines, websites, and social media platforms like Pinterest. Make a list of the materials and tools you’ll need and ensure you have a workspace where you can comfortably work on your projects.
Upcycling: Transforming Old into New
What is Upcycling?
Upcycling involves taking old, unused items and transforming them into something new and useful. This eco-friendly practice reduces waste and can result in some truly unique decor pieces.
Upcycling Furniture
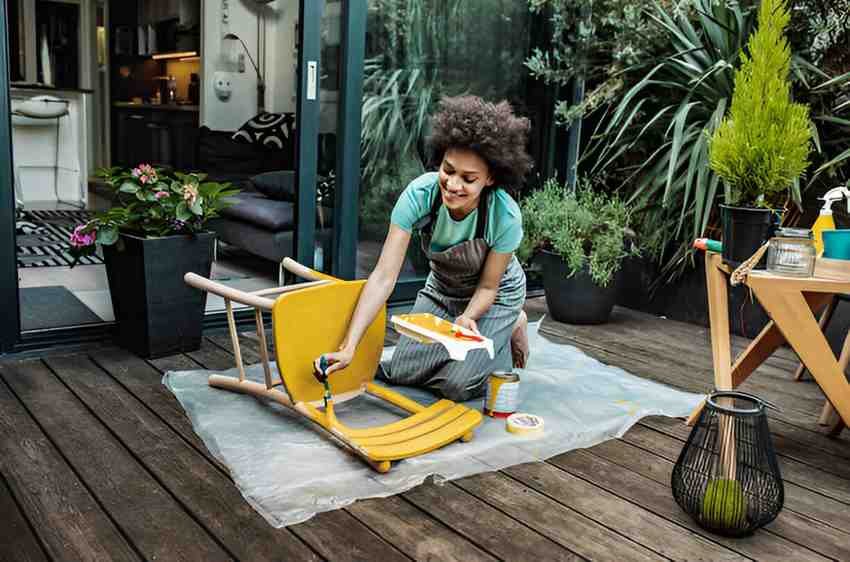
One of the most popular forms of upcycling is transforming old furniture. With some paint, new hardware, and a bit of creativity, you can breathe new life into an old dresser, chair, or table.
Step-by-Step Guide to Upcycling a Dresser
· Choose Your Piece:
Select an old dresser that needs a makeover. Ensure it’s structurally sound.
· Prepare the Surface:
Sand the dresser to remove any old paint or varnish. This helps the new paint adhere better.
· Paint:
Choose a paint color that complements your decor. Apply a primer first, then your chosen color. You may need several coats for full coverage.
· Add New Hardware:
Replace old drawer pulls with new ones for an updated look.
· Finish:
Once the paint is dry, apply a clear sealant to protect the surface.
Upcycling Home Decor Items
You can also upcycle smaller decor items. For example, old picture frames can be repainted and used to display new photos or artwork. Glass jars can be turned into stylish vases or storage containers.
Creating Your Artwork
Why DIY Artwork?
Creating your artwork is a fantastic way to personalize your space. You don’t need to be a professional artist to make beautiful pieces. Plus, DIY art can be a fun and relaxing activity.
Simple DIY Art Projects
Abstract Canvas Art
· Materials Needed:
Canvas, acrylic paints, brushes, palette knife.
· Choose Your Colors:
Select a color palette that matches your decor.
· Create Your Design:
Use a brush or palette knife to apply paint to the canvas. Experiment with different techniques like blending, layering, and texturing.
· Let It Dry:
Allow your artwork to dry completely before hanging it up.
Framed Fabric Art
· Materials Needed:
Fabric, frame, scissors, glue.
· Choose Your Fabric:
Select a fabric with a pattern or color that you love.
· Cut and Frame:
Cut the fabric to fit the frame. Secure it in place with glue if needed.
· Display:
Hang your framed fabric art on the wall for a pop of color and texture.
Personalizing Store-Bought Art
If creating your art from scratch feels daunting, consider personalizing store-bought pieces. You can add your touches, like painting over parts of the design, adding embellishments, or uniquely framing the art.
DIY Wall Decor
Creating a Gallery Wall
A gallery wall is a great way to display a collection of art, photos, and other items. It adds visual interest to a room and can be easily updated over time.
Steps to Create a Gallery Wall
· Choose Your Wall:
Select a wall with enough space to display multiple pieces.
· Gather Your Items:
Collect a variety of items, including framed art, photos, mirrors, and other decor pieces.
· Plan Your Layout:
Lay the items on the floor and arrange them until you find a layout you like. Take a photo to reference later.
· Hang Your Items:
Start with the centerpiece and work your way out, using your photo as a guide.
DIY Wall Hangings
Wall hangings can add texture and interest to a room. You can create your own using materials like yarn, fabric, or even natural elements like branches and leaves.
Making a Yarn Wall Hanging
· Materials Needed:
Yarn, dowel or branch, scissors.
· Cut Your Yarn:
Cut multiple pieces of yarn to your desired length.
· Attach to Dowel:
Fold each piece of yarn in half and loop it over the dowel or branch, pulling the ends through the loop to secure.
· Trim and Style:
Once all the yarn pieces are attached, trim the ends to create a neat finish. You can also add knots, braids, or other details for extra interest.
DIY Lighting Projects
Why DIY Lighting?
Lighting plays a crucial role in setting the mood of a room. DIY lighting projects allow you to create unique fixtures that add personality and charm to your space.
Simple DIY Lighting Ideas
Mason Jar Lights
· Materials Needed:
Mason jars, string lights LED candles, and hooks.
· Prepare the Jars:
Clean and dry the jars thoroughly.
· Insert Lights:
Place the string lights or LED candles inside the jars.
· Hang or Display:
Use hooks to hang the jars, or simply place them on shelves or tables.
Painted Lamp Bases
· Materials Needed:
Lamp base, spray paint, painter’s tape.
· Prepare the Base:
Clean the lamp base and cover any parts you don’t want to paint with painter’s tape.
· Spray Paint:
Apply the spray paint in thin, even coats. Allow each coat to dry before applying the next.
· Reassemble:
Once the paint is completely dry, remove the tape and reassemble the lamp.
Customizing Textiles
DIY Pillows and Cushions
Custom pillows and cushions can add comfort and style to your home. You can create your covers using fabric, paint, or even old clothing.
Painted Pillow Covers
· Materials Needed:
Plain pillow covers, fabric paint, stencils, and brushes.
· Choose Your Design:
Select a stencil or create your own design.
· Paint:
Use fabric paint and a brush to apply the design to the pillow cover.
· Let It Dry:
Allow the paint to dry completely before using the pillow.
Personalized Blankets
Personalized blankets can make great gifts or cozy additions to your home. You can add your touches with embroidery, fabric paint, or applique.
Embroidered Blankets
· Materials Needed:
Blanket, embroidery floss, needle, embroidery hoop.
· Choose Your Design:
Decide on a design or monogram to embroider.
· Embroider:
Use an embroidery hoop to keep the fabric taut and stitch your design using embroidery floss.
· Finish:
Once your design is complete, remove the hoop and trim any excess threads.
DIY Storage Solutions
Creative Storage Ideas
Storage solutions don’t have to be boring. With some creativity, you can create stylish storage that keeps your home organized and clutter-free.
Upcycled Storage Bins
· Materials Needed:
Old cardboard boxes, fabric or wrapping paper, glue.
· Cover the Boxes:
Use fabric or wrapping paper to cover the outside of the boxes. Secure with glue.
· Add Handles:
Attach handles made from ribbon or rope for easy carrying.
· Label:
Add labels to identify the contents of each bin.
Customized Shelving
Customized shelving can add both storage and display space to your home. You can build your shelves using simple materials like wood and brackets.
Building Simple Floating Shelves
· Materials Needed:
Wood boards, brackets, screws, drill, level.
· Cut the Wood:
Cut the wood to your desired length.
· Attach Brackets:
Attach brackets to the wall using a drill and screws. Use a level to ensure they are even.
· Install Shelves:
Place the wood boards on top of the brackets and secure with screws.
Seasonal DIY Decor
Decorating for Different Seasons
Seasonal decor can keep your home feeling fresh and festive throughout the year. DIY projects allow you to create unique decorations for each season.
Spring: Floral Wreaths
· Materials Needed:
Grapevine wreath, faux flowers, floral wire, wire cutters.
· Prepare the Wreath:
Attach the faux flowers to the grapevine wreath using floral wire.
· Add Greenery:
Fill in any gaps with additional greenery or smaller flowers.
· Hang:
Use a ribbon or hook to hang your wreath on the door or wall.
Summer: Beach-Inspired Decor
· Materials Needed:
Shells, driftwood, sand, glass jars.
· Create a Beach Scene:
Fill glass jars with sand and arrange shells and driftwood inside.
· Display:
Place your beach-inspired decor on shelves, tables, or mantels.
Fall: Pumpkin Centerpieces
· Materials Needed:
Mini pumpkins, paint, brushes, candles.
· Paint the Pumpkins:
Use paint to decorate the mini pumpkins. You can create patterns, monograms, or simple designs.
· Arrange:
Place the painted pumpkins in a tray or bowl and add candles for a cozy centerpiece.
Winter: Handmade Ornaments
· Materials Needed:
Clear ornaments, paint, glitter, ribbon.
Decorate the Ornaments:
Remove the tops of the clear ornaments and fill them with paint or glitter. Replace the tops and add a ribbon for hanging.
· Hang on the Tree:
Use your handmade ornaments to decorate your Christmas tree.
Tips for Successful DIY Projects
Planning and Preparation
Before starting any DIY project, it’s essential to plan and prepare. Make sure you have all the necessary materials and tools and set aside enough time to complete the project.
Learning New Skills
DIY projects often require learning new skills. Don’t be afraid to try new techniques or use unfamiliar tools. There are plenty of online tutorials and classes that can help you learn.
Safety First
Always prioritize safety when working on DIY projects. Wear protective gear, work in a well-ventilated area, and follow all safety instructions for tools and materials.
Conclusion
DIY home decor projects offer a fantastic way to personalize your space, express your creativity, and create a home that truly feels like yours. From upcycling old furniture to creating your artwork, the possibilities are endless. With a bit of planning, creativity, and effort, you can transform your home into a stylish and comfortable sanctuary that reflects your unique personality. So, roll up your sleeves, gather your materials, and start your DIY home decor journey today.


